This is a step by step guide to finding, purchasing and remodeling your dream Kailua fixer upper.
Kailua is a beach community on the Windward side of Oahu which has become wildly popular with tourists and locals alike. The sandy beaches and lovely shops have drawn more and more visitors to this one of a kind neighborhood and have brought with it a number of changes. The old single wall constructed beach cottages are being replaced by new construction and extensive remodels. The idea of living the Aloha Lifestyle in a beach bungalow in Kailua has become the dream for many people from all over the globe. The following guide highlights the most important steps in this process.
Step 1: Finding and securing the right property
This is obviously the most important of all steps and is a lot more complex than going on line and searching the Kailua open house listings. Most so called fixer uppers in Kailua are subject to multiple offers and bidding wars. Chances are that by the time the first open house is scheduled two scenarios will take place:
Scenario A: The seller already has an accepted offer and is just looking for back up. This happens a lot and has to do with the very active and ‘Akamai’ community of real estate professionals that specialize in the Kailua/Lanikai neighborhood. For non-Hawaiians the word ‘Akamai’ is a way of describing resourcefulness, intelligence and tact. I love all my fellow agents in Kailua and respect them. We all may work for different companies, but there is mutual respect and cooperation. So what that means is a lot of agents will find out about properties right before they come on the market and will try to put their buyers in the best possible position. So what does a savvy buyer have to do to get themselves into such a position? First and foremost the buyer must have absolute trust in his agent and be ready to act quickly.
The home presented here is a perfect example of a proactive and trusting buyer. Scott and Cheri have been my clients for years and we developed a great rapport to a point where they trusted my judgement 100%. I guided them through transactions before and knew their desire of living close to the sandy beaches of Kailua and enjoying the lifestyle. So even though they just had moved into their dream home on the ocean on the West Side, I knew when I saw this property that they had to get it. Through personal connections I heard of the home being listed in a few days and contacted the agent asking him for an early showing. This by the way happens all the time, not only in Kailua, so there is an amount of luck and persistence involved that all diligent and professional agents have. I called my clients and told them to meet me that day and we went to see it. Needless to say they immediately saw that it was their diamond in the rough and we wrote an offer on the spot. There was no hesitation or questions, we just offered full price with as smooth of an offer possible. Once escrow was opened we really went to work. More about that later… Now to the other scenario
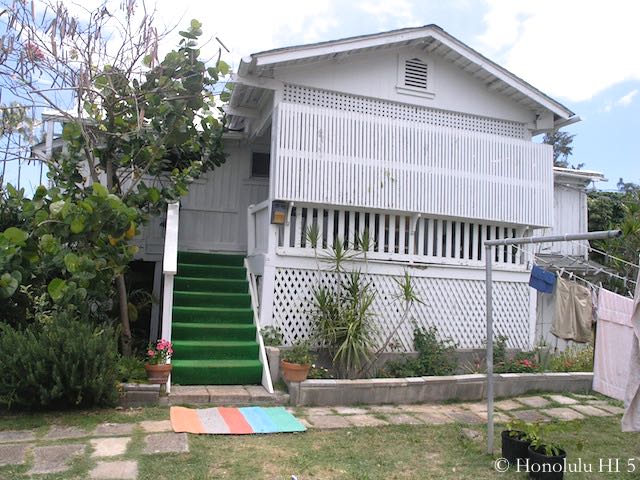
Just before we move on…. here is a picture of the property when we first saw it!

Scenario B: The seller is not accepting any offers until the first open house and then will give prospective buyers a deadline to submit offers. This scenario has become very popular especially for lower priced homes in Kailua. It benefits both buyer and seller, because it will encourage all buyers to make their best offer without getting into a bidding war. The seller then with the expert advice from their agent will have multiple offers to choose from and will accept the one that works the best and also will have at least one back –up. There are many factors that determine what the best offer is. In dealing with a situation like this on the buy side I will always research the property extensively to determine the value and then come up with the right price and terms. A lot of buyers come to me and tell me they will offer lower than asking with all cash. That does not work in a hot market like the Kailua. Cash or financing, money is money to the seller. An offer with ample cash down and pre-approved financing can be just as attractive to a seller as all cash.
The buyer has only one opportunity to make this offer the best it can be and that means it has to be written with strong back up on cash verification, loan approval and a personal letter introducing the prospective buyer. Sellers that have multiple offers to choose from like to feel a personal connection to the new owners… Again that is all part of what a good agent will help you with. One other thing: don’t bug the seller’s agent too much, they have way too much going on, just write a killer offer!!!!
The above two scenarios require commitment by agent and buyer and with the right preparation and positive attitude will result in making it happen, not only in Kailua!
Step 2: Laying out a plan of action
Congratulations you are now the proud owner of a fixer upper!
This is when reality hits you and the real work begins. Scott and Cheri bought a home in disrepair with two long term renters on it. It was termite infested, had old plumbing and outdated electric wiring. Mind you they still paid a small fortune for it and now had a new mortgage to deal with.
So what did they do? After cracking open a bottle of champagne and enjoying their first of many Kailua beach sunsets, they had to make the first major decision to even move forward.
Is this home worth saving or does it make more sense to tear it down and start new construction?
Here are some points to consider when making this big decision:
Option A: Tearing down a fixer upper and starting brand-new gives the owners the maximum freedom in creating the home that suits their needs. All the old issues and problems can be erased and the new home can be up to date in all aspects of design and finishes. Another advantage is that the estimated cost for building the home is a lot more accurate and a lot of times will be less expensive than a complete remodel. The reason of course is that when you start fresh with the proper architectural drawings and a detailed scope of work list there will be less surprises and dreaded change orders.
The big drawback is the carry cost for the project. For the entire time of demolition and the construction, the property will not have any use to the owner. This carry cost can be very substantial and projects tend to always run behind schedule. Being on an island in the middle of the Pacific makes it sometimes very challenging to source all the materials locally and will most certainly cause unforeseen delays in shipping from the mainland or countries such as Bali or Thailand.
Option B: Work with the existing structure and do an extensive remodel. This option is not going to give the buyers the same freedom of design, but it enables more unique aspects of the existing structure to be saved. Especially with ocean front properties the remodel is the way to go since setback rules have changed over the years in regards to proximity to the water. That means once you tear down the old home you will have to apply for a new shoreline survey and are risking not to be allowed building as closely to the water as the original home was. On top of that the timeframe for a building permit that requires a shoreline survey is up to a year!
A remodel allows for flexibility with construction and can be done in phases so part of the old home can be lived in to save on rent. For example you may just add an additional story to an existing garage and live in the main home while it is being built. After completing that phase you move into the addition and remodel the rest of the home. Being on site during construction is definitely a sacrifice when it comes to privacy and comfort, but it is the best way to stay on top of the project and in itself will help save money by making sure the work is done properly.
My clients Scott and Cheri decided to save the structure and go the remodeling route. This allowed them to keep the renters for another year and work on all the planning and purchasing that is involved. They also were committed to live on property while they went through the remodeling process. It saved them from paying for two homes during the transition. Keeping the renters gave them cash flow to service the new mortgage and time to put all the right pieces into place before delving into the remodel. On top of that they established a great relationship with the tenants giving them ample time to look for alternative places to rent. By treating the tenants with respect, not jacking up their rent and maintaining the home so it still was in livable condition Scott and Cheri set the tone for a positive relationship with the property and the neighbors. Their property had two long term rental units on the first floor and a main living area on the second. So for the first year they kept the tenants and moved into the main part of the home themselves. This gave them a head start on the extensive landscaping and a good sense of how Kailua Beachside living fit in with their lifestyle. A year after closing on their fixer upper Scott and Cheri were ready to start construction. The tenants had moved out and all the necessary steps were put in place.
Step 3: Finding the right team for the job
Whether it’s new construction or a remodel, both require the services of an architect and a contractor. The architect and the contractor will determine the design and the budget.
When choosing an architect to work with there are three main aspects:
Design and vision: look at portfolio and existing homes they designed, interview the architect and see how they respond to your vision.
Expertise, reputation and licensing: Hire a licensed architect with a good reputation.
Cost: It ranges depending on size and quality level of project. The fees basically depend on scope of project and time spent.
To get a permit you need to apply at the Department of Planning & Permitting in person or you can apply online right here. Typically the contractor will handle the permitting process and you may want to confirm how connected the contractor is, as that may impact permit turnaround time. Depending on the scope of the project, permits required may include architectural, electrical, mechanical (example: ducted A/C), structural, lighting, audio visual, landscaping type permits.
The design process ranges in time based on the complexity of the project and the longer it takes the higher the cost will be. After the design process is completed and the construction documents are created they are ready to be sent out to bid to multiple contractors.
This is the most important decision in the whole process and should be done very thoroughly. You definitely can begin your research way ahead of time as soon as you go into escrow. Same goes for the design process. A good way to get started is to drive around Kailua and look at newly built homes. If you find one you like, just see if it still has the sign of the contractor in the front and then give them a call. If you’re a little bolder you can actually knock on the door and see if you can speak to the owner. That way you get first hand testimony which is the best information you can have. People are normally very friendly and love to talk about their new home, especially if they have someone complementing them on how beautiful it is. Referrals from friends or people in the business such as architects or interior designers are a great resource too. You definitely want to have the contractor show you some the homes they have completed and possibly get to talk to the owners. Call up the Better Business Bureau to see if they are registered and do research online.
Again I recommend getting at least three bids from three different contractors. Make sure to compare Apples to Apples when you look at bids, meaning all bids contain the same scope of work and materials. The more detailed the contract is the better it is.
Step 4: The Construction Contract
Each contractor will have a slightly different template but the key pieces are going to always be the same.
Article 1 Contract Sum
Here is an example:
Contractor X proposes the sum of $500,000 (including the Hawaii GE Tax) to complete the project. This Agreement is valid for a period of 30 days after which time the contractor reserves the right to submit a revised estimate.
The Contract Sum represents the cost for all the work agreed upon in the contract excluding Change Orders and Allowances. So it is not a realistic final budget. To be on the safe side most people I talk to in the business recommend adding 25% to the original Contract Sum.
Article 2 Scope of Work
This will in detail list all the work items the contractor agrees to complete based on the architectural plans and specs that were provided for the bid. This list can be very extensive and it is very important to go over it line by line. You may come across some items that you want to take care of yourself to save on cost. If so you remove or revise the items and have an updated contract sent to you.
This Scope of Work article will also list exclusions that are not part of the contractor’s responsibilities. In Scott and Cheri’s case they purchased all the appliances and electrical fixtures on their own so that was excluded. The cost for the construction permit and other municipality fees are also excluded in most contracts.
Permit process: This can be very time consuming and frustrating and needs to be discussed with the architect. The architect is responsible to explaining the different options which include expedited and conventional permitting. Hiring a permit expeditor is money well spent and needs to be discussed with the architect.
Article 3 Time of Completion
The contractor agrees to a start date and a completion date. Some contracts may have provisions for liquidated damages for going over the forecasted date, some will specifically state that there are no such provisions.
Article 4 Progress Payments
Here is an example:
Progress payments are made to protect the Owner to ensure that work is being performed as expected, and to protect the Contractor to ensure that payments are being made. Owner shall pay the Contract sum based on the following payment schedule:
| Draw Milestone | Percentage | Draw Amount |
|---|---|---|
| Construction Startup | 20% | $100,000 |
| Demolition Complete | 15% | $75,000 |
| Concrete Complete | 15% | $75,000 |
| Roofing Complete | 15% | $75,000 |
| Drywall Complete | 15% | $75,000 |
| Cabinets Installed | 10% | $50,000 |
| Countertops Installed | 5% | $25,000 |
| Final Payment | 5% | $25,000 |
| Total | 100% | $500,000 |
Progress payments are due within (3) days of achieving milestone. Contractor reserves the right to stop work upon non-payment.
Overdue payments shall bear interest at a rate of 1.5 % a month until paid.
Article 5 Additional Work Order Authorization
This article refers to any alteration or deviation from the original drawings, specs or scope resulting in additional labor and or material cost. These are the so called Change Orders that can add up very quickly and make the project way more costly than initially budgeted. It is very important to have an agreement of how to handle these change orders. They can either be charged as a lump sum or as a cost plus fee method. In either case both the contractor and the owner have to agree in writing on every change order. This is very important to pay attention to so the cost does not spiral out of control. Should there be a dispute later after the work has been performed there is a record.
Article 6 Allowances
Allowances are portions of the budget where the exact cost is unknown and can only be determined during construction. It basically accounts for the unknown materials that have not yet been selected. Kitchen appliances are a great example. Let’s say you go from GE, Samsung or LG to the next level which is Jen Air or Kitchen Aid to the highest level of Sub Zero, Wolf and Gaggenau. There of course is a big price difference and per contract the owner is responsible for that additional cost.
Article 7 General Terms
Make sure there is a warranty clause in the general terms and read it carefully.
The contract also has to include a Contractor’s Liability Insurance Clause and a Comprehensive General Liability with at least one million Dollars coverage.
The final portion of the contract has to include the Hawaii Revised Statutes Addendum
Here are some helpful cost saving tips to keep the project close to budget:
Make sure to be as specific as possible in the initial scope of work agreement. For example in Scott and Cheri’s project they specifically stated they wanted 6 inch baseboards and not the standard 4 inches. When the contractor installed the wrong ones they had the contract to save them the additional cost for changing it.
If you know you want a built in sound system make sure to have the necessary work specified to have it ready for installation.
Any materials you can source and order yourself will save you money. Per contract there is a usual mark up of 15% that the contractor/builder charges for any materials they order.
Purchasing countertops, flooring, fixtures and even windows can add up to a huge amount of savings. This of course will have to be agreed upon in the initial contract.
Also make sure you have a good relationship with the project manager. This will result in saving time and money.
Step 5: The actual Construction
Finally you are getting started and if everything goes as planned there should be ample communication between you and the contractor and /or the construction manager. Every project will have its unique challenges and most likely there will be unforeseen issues during construction. Therefore it is very important to be as detailed as possible in the contract when it comes to change orders and allowances.
Courtesy inspections will happen throughout the build process and include electrical, plumbing and final inspection. Make sure to ask your contractor to communicate to you about these inspections and stay informed. Upon completion of construction the building permit will be closed out.
If you’re still have a great relationship with your contractor and the subs then congratulate yourself for a job well done! Time to have a second bottle or more of bubbly and enjoy the Aloha Lifestyle!
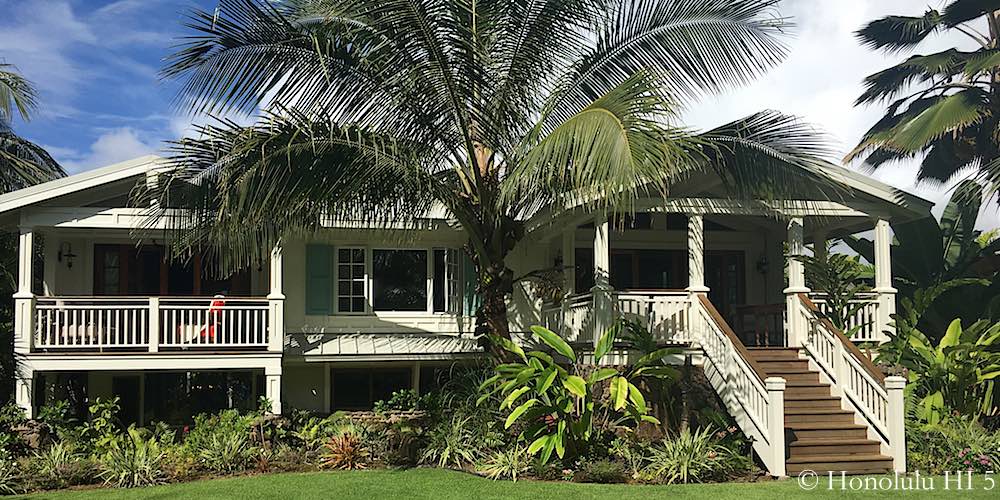
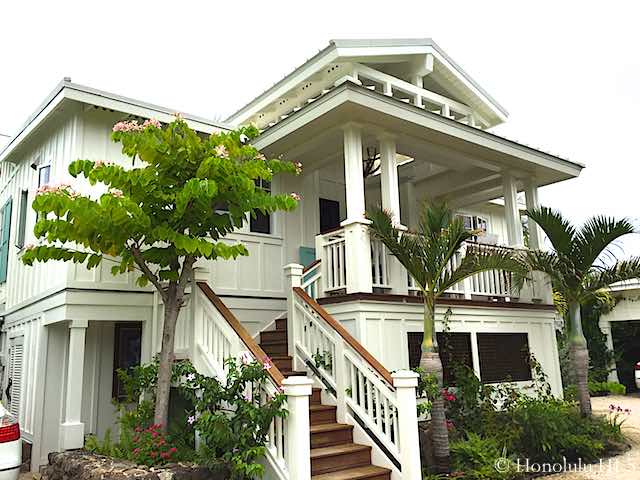
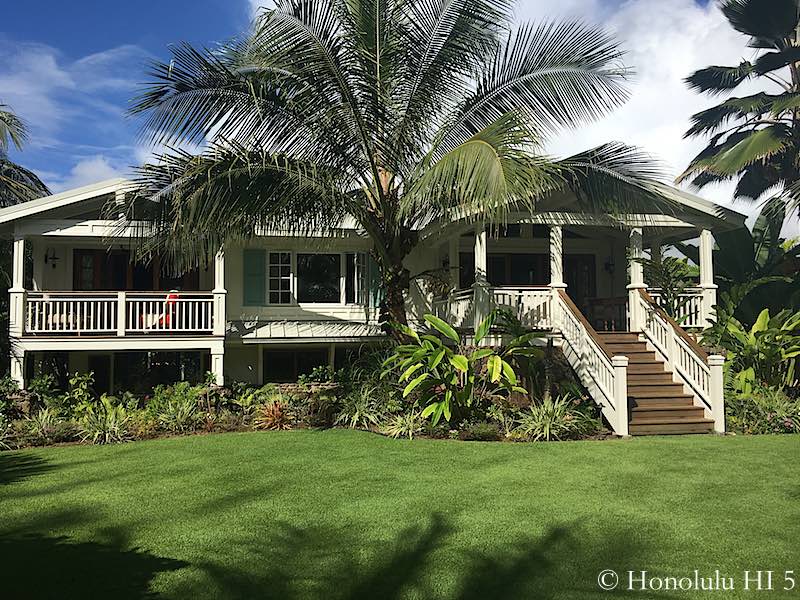
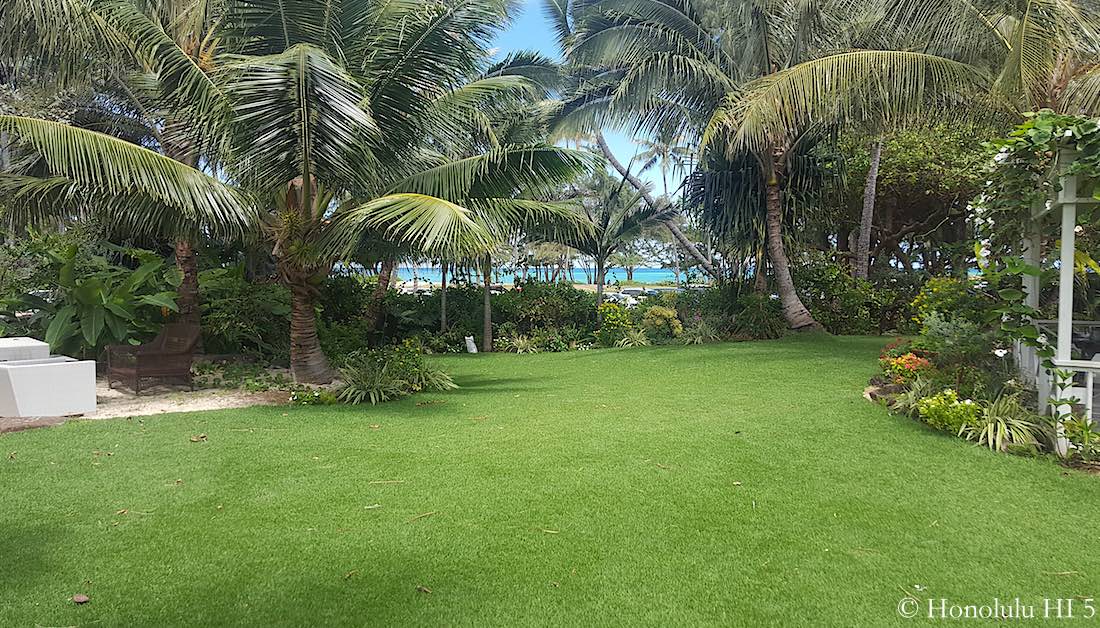
Here are pictures of Scott and Cheri’s private retreat on Kailua Beach!
Contact us with any questions or even just to share your experiences with Kailua fixer uppers!
~ Mahalo & Aloha
Gorgeous! Gorgeous! Gorgeous!